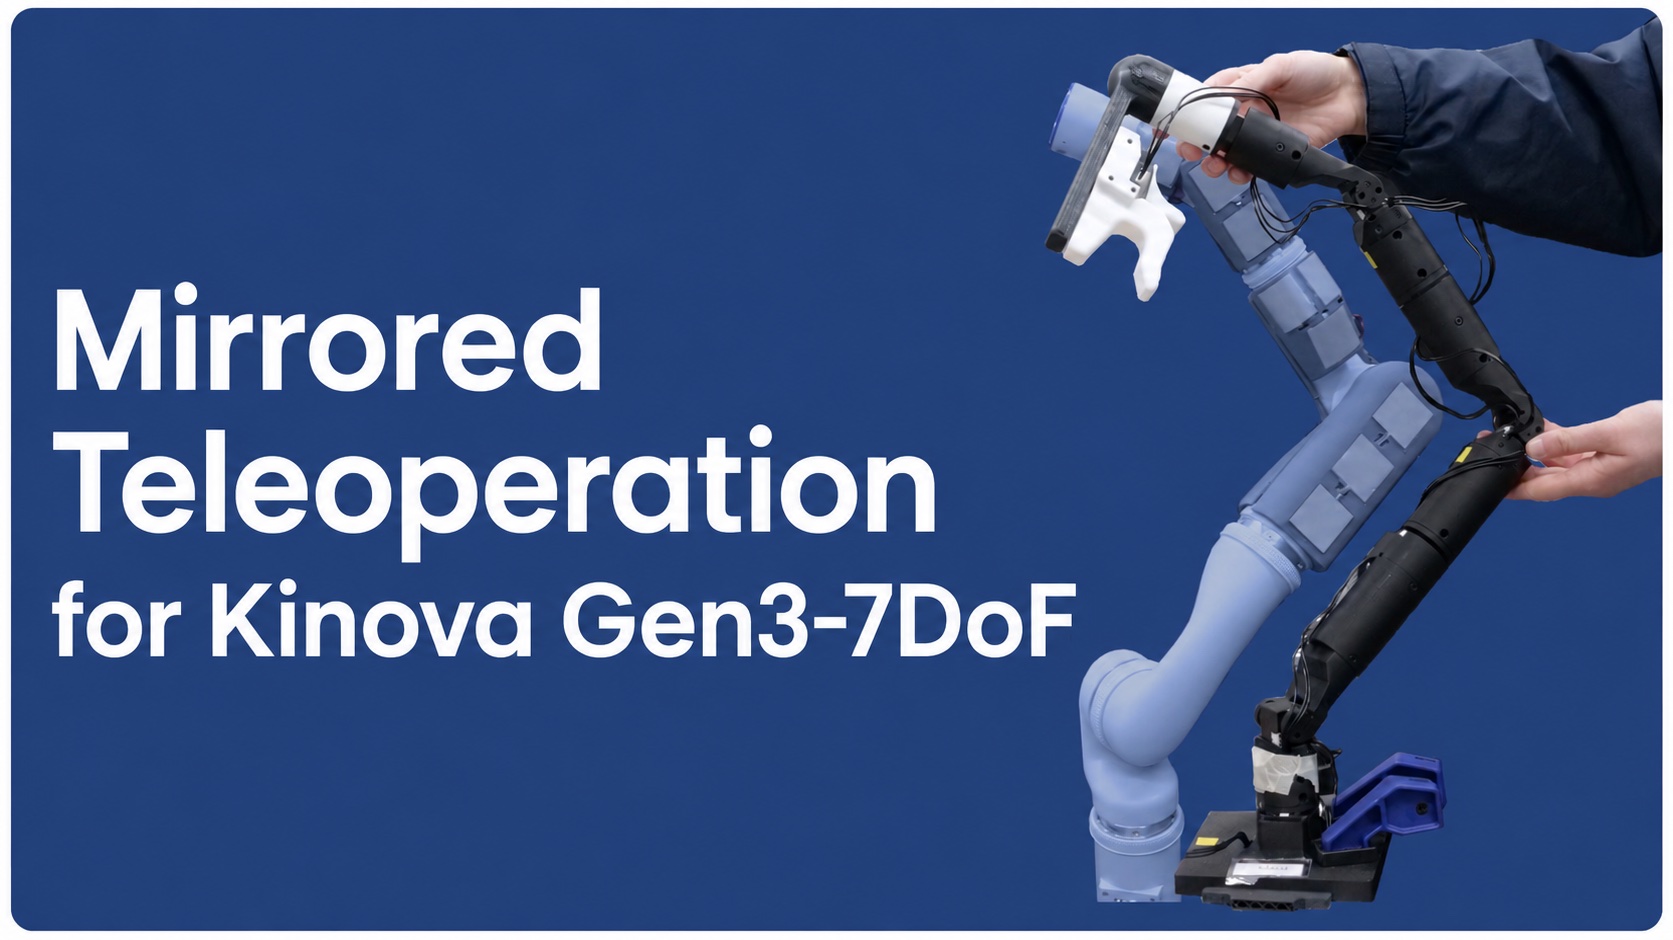
TACTIC · Open Hardware
Leader Arm
A mirrored Kinova Gen3 teleoperation interface for collecting whole-arm demonstrations.
Overview
The leader arm is a scaled replica of the robot: seven Dynamixel XL330-M288-T actuators match the Kinova Gen3-7DoF's kinematic structure, and joint velocity measurements are mapped to robot velocity commands at 40 Hz. An additional XL330-M077-T actuator in a trigger handle controls the start and end of data collection; safety mechanisms and paired initialization procedures ensure stable operation.
Bill of Materials
| Vendor | Part | Unit cost | Qty | Cost | Link |
|---|---|---|---|---|---|
| Robotis | Dynamixel XL330-M288-T | $27.49 | 7 | $192.43 | Product page |
| Robotis | Dynamixel XL330-M077-T | $27.49 | 1 | $27.49 | Product page |
| Robotis | U2D2 | $36.92 | 1 | $36.92 | Product page |
| Robotis | U2D2 Power Hub Board Set | $21.85 | 1 | $21.85 | Product page |
| Total | $278.69 | ||||
You will also need a 5 V DC power supply and a small Phillips-head screwdriver.
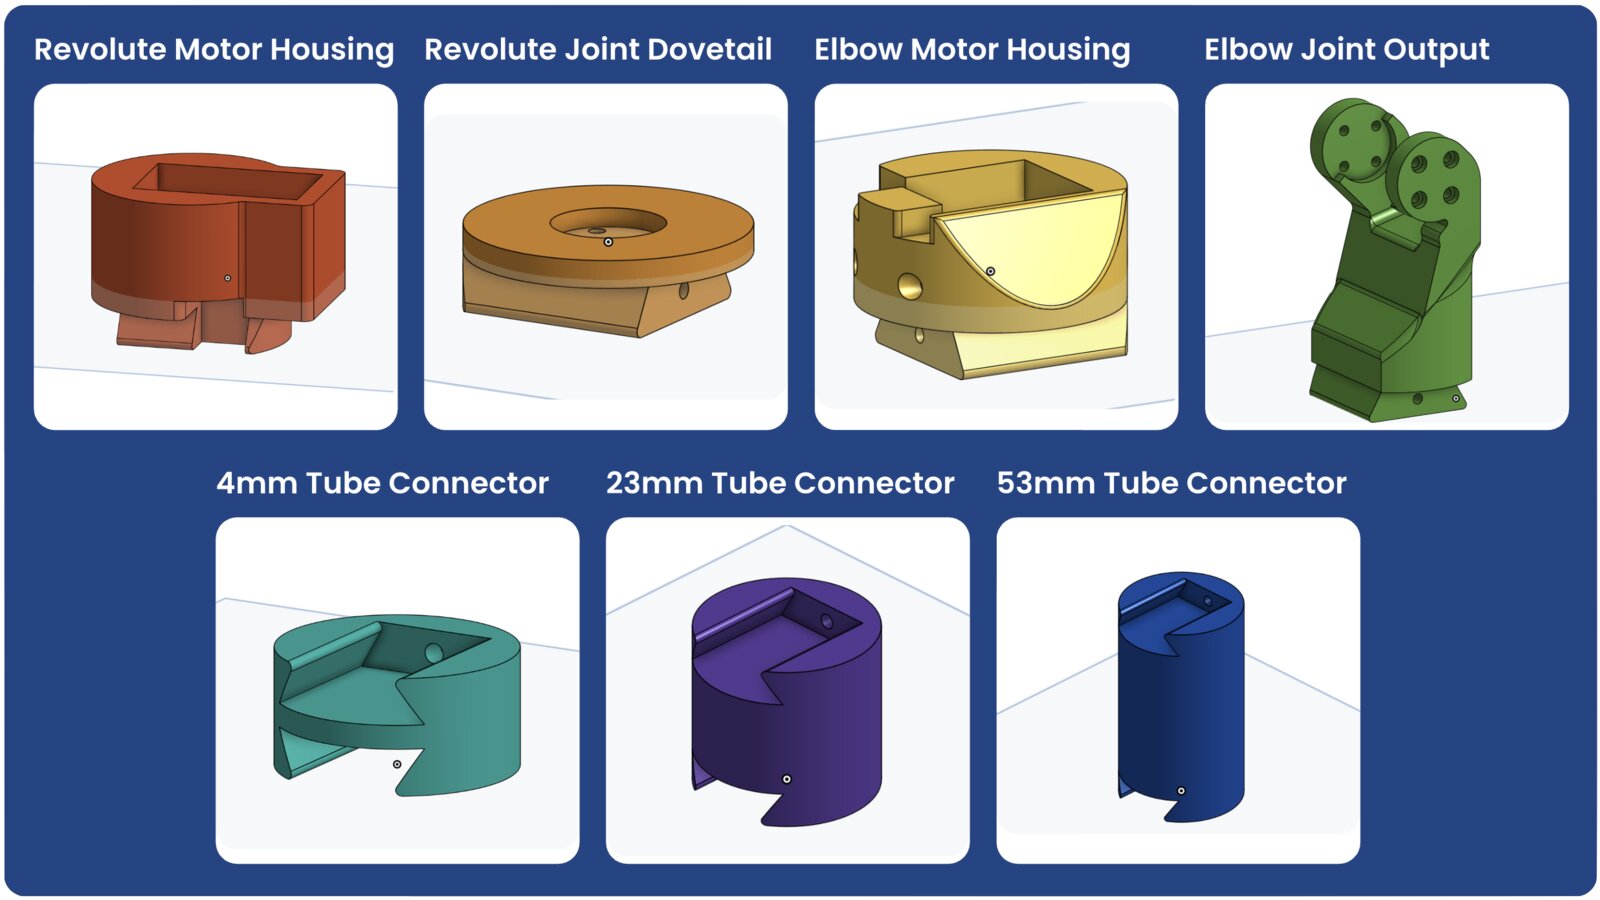
Printed Parts
All structural pieces are 3D-printed. STL and CAD files are in the hardware files folder.

Assembly
Step 1 · Build the arm
The arm consists of seven joints, each driven by an XL330-M288-T. Assemble four revolute joints and three elbow joints:
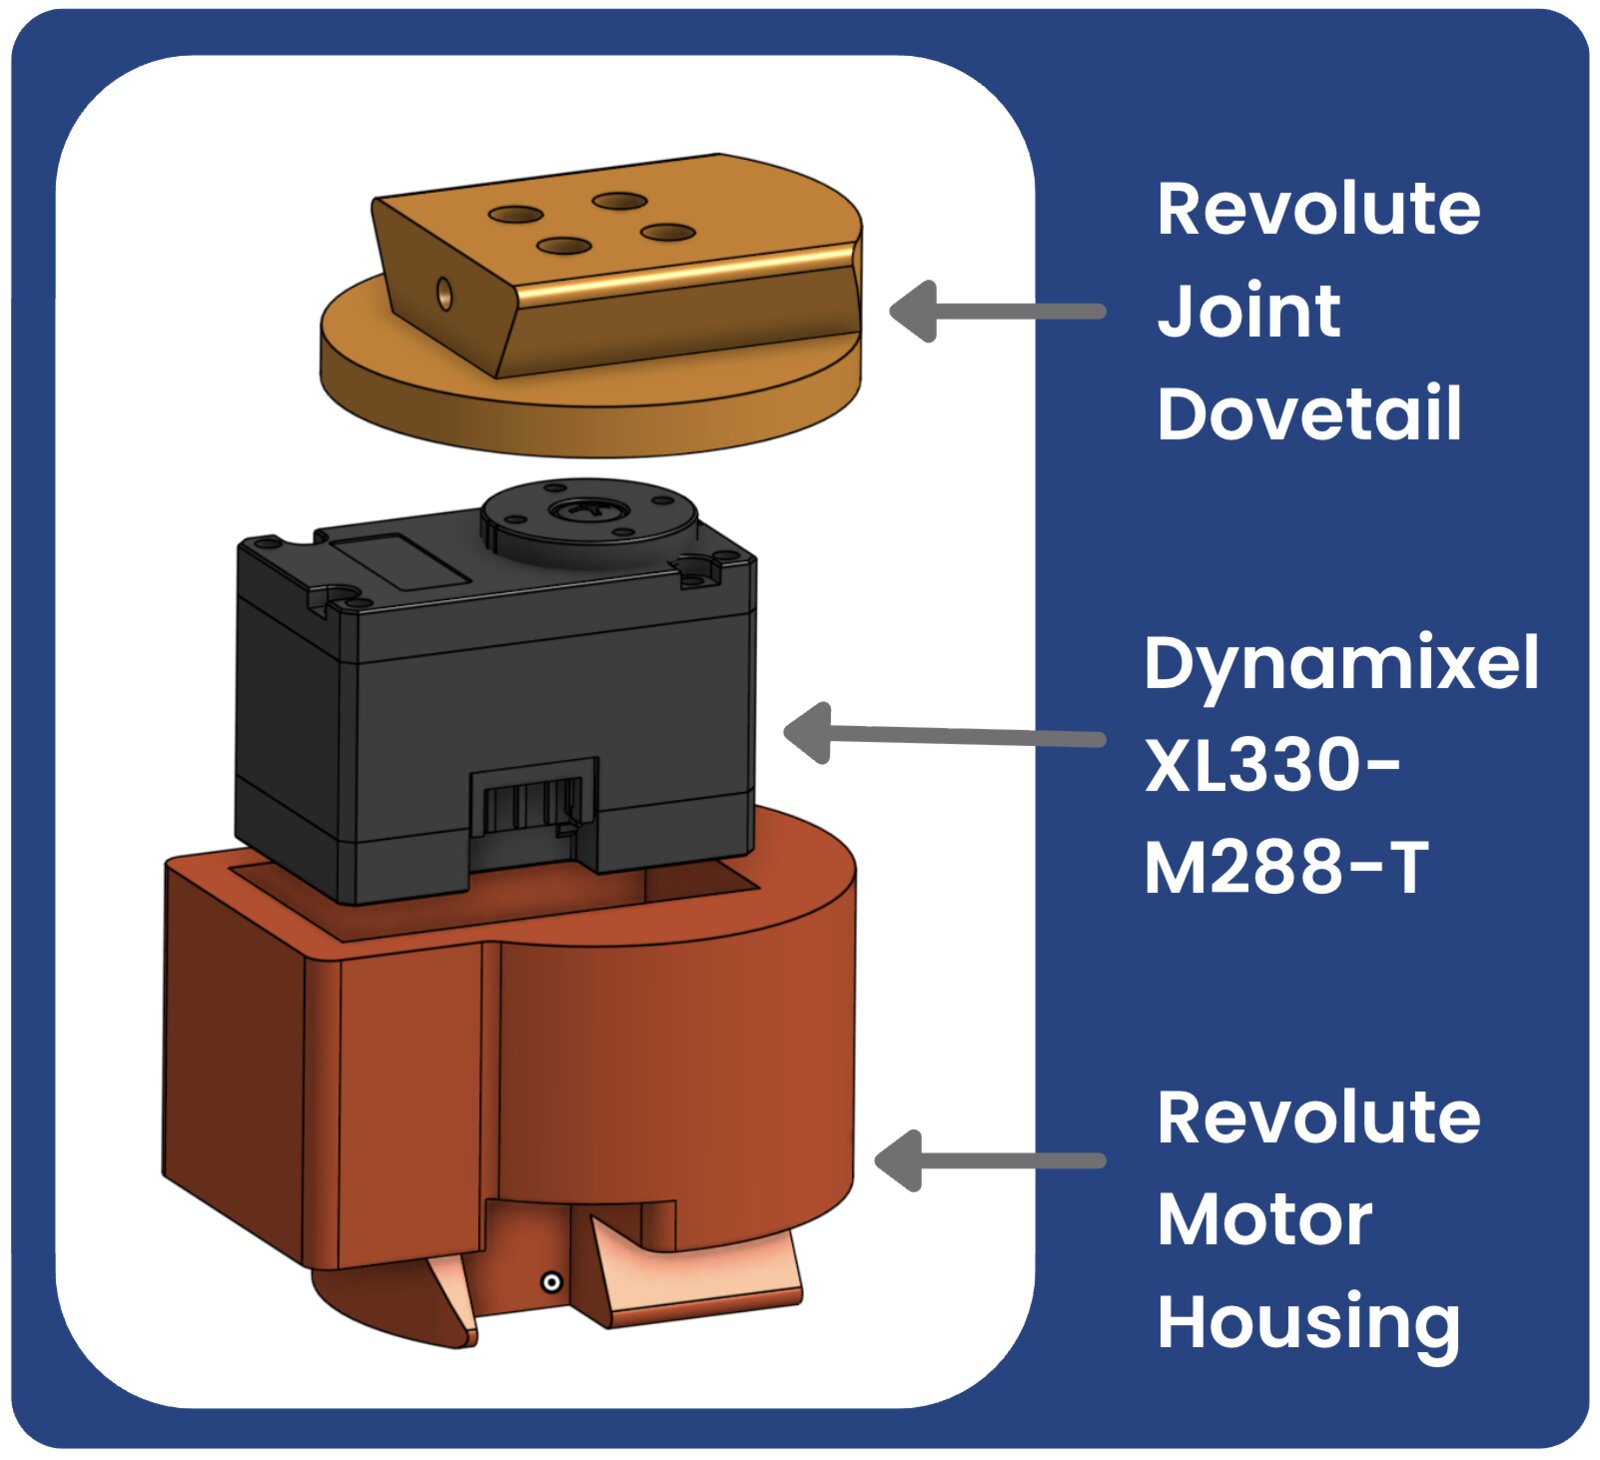
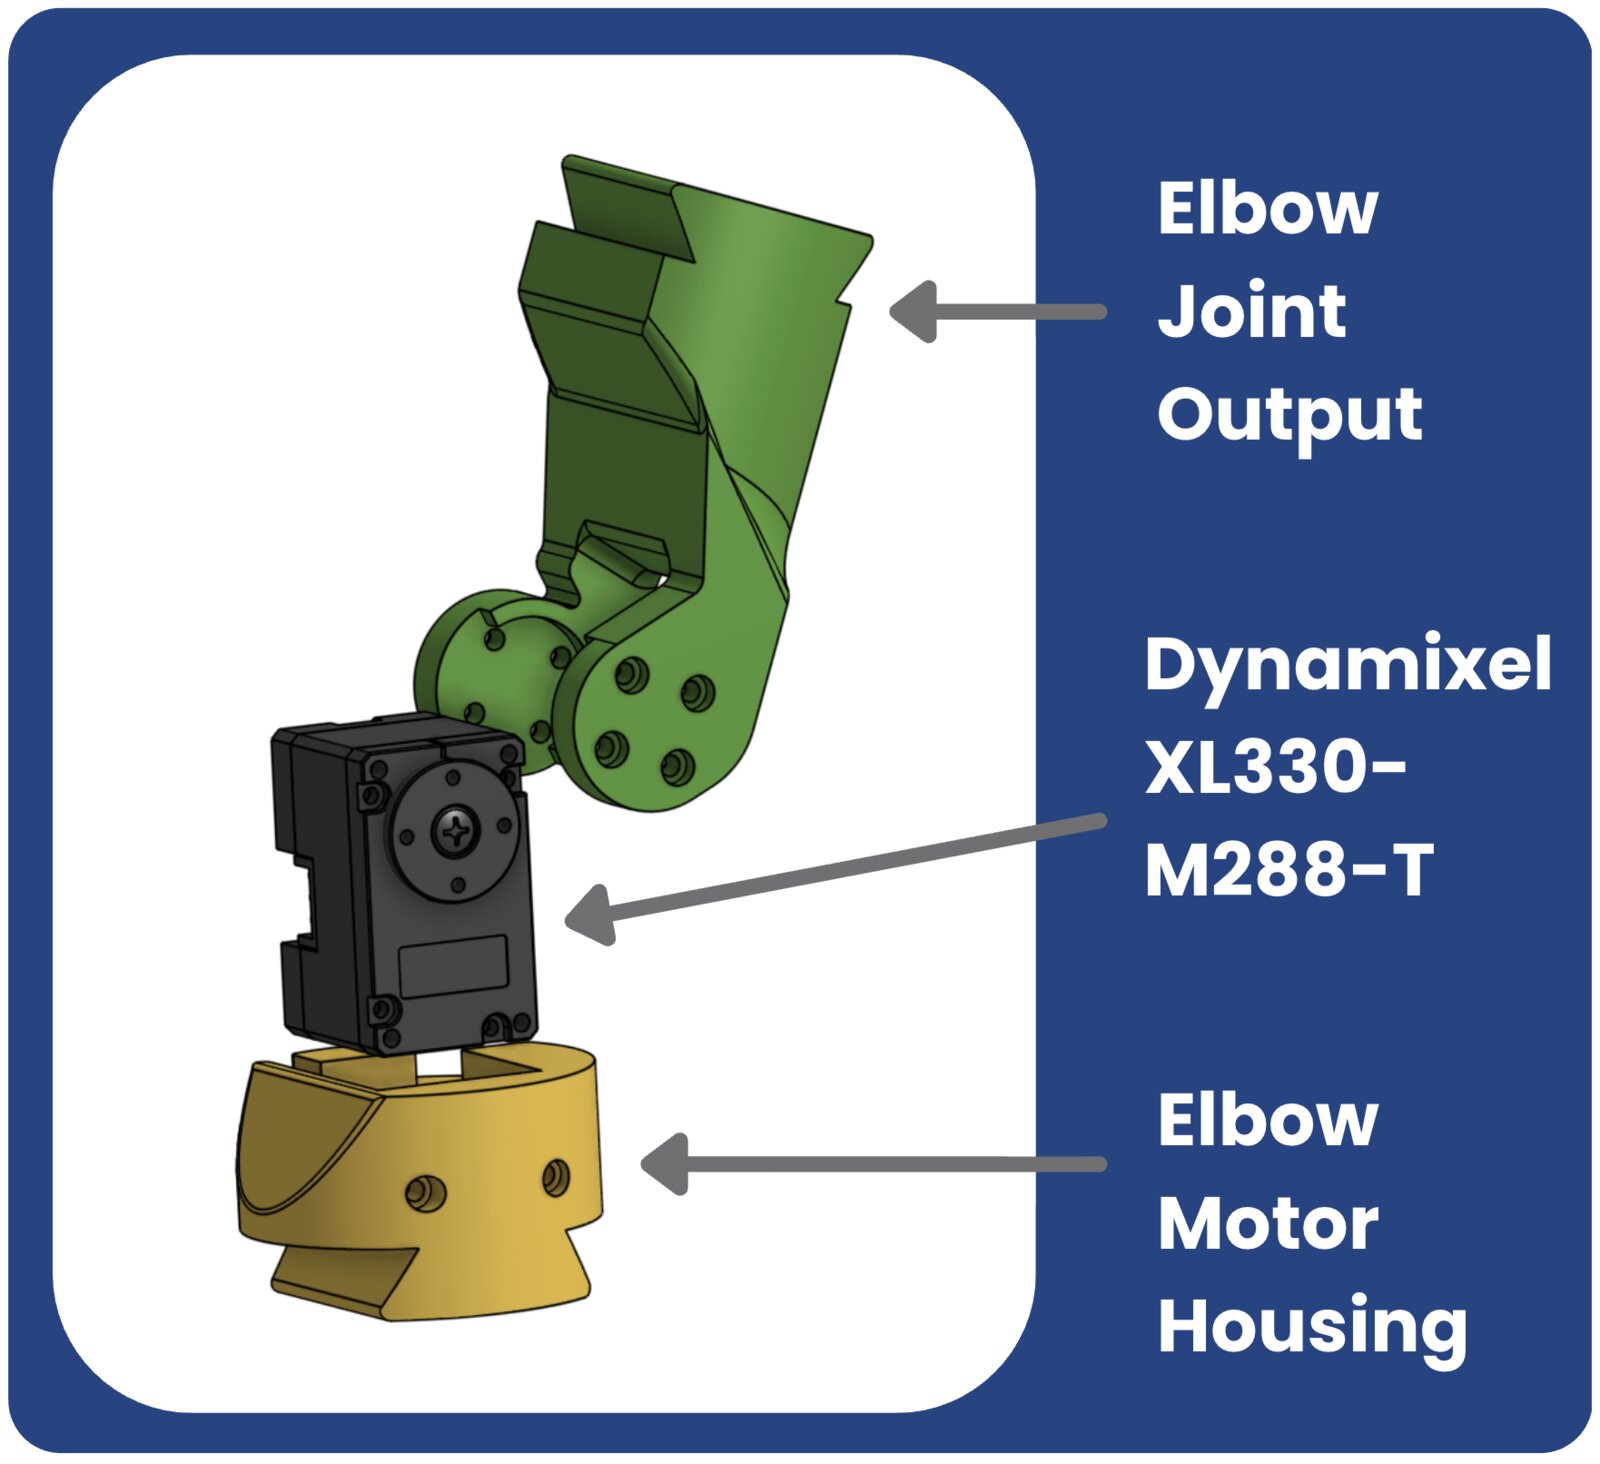
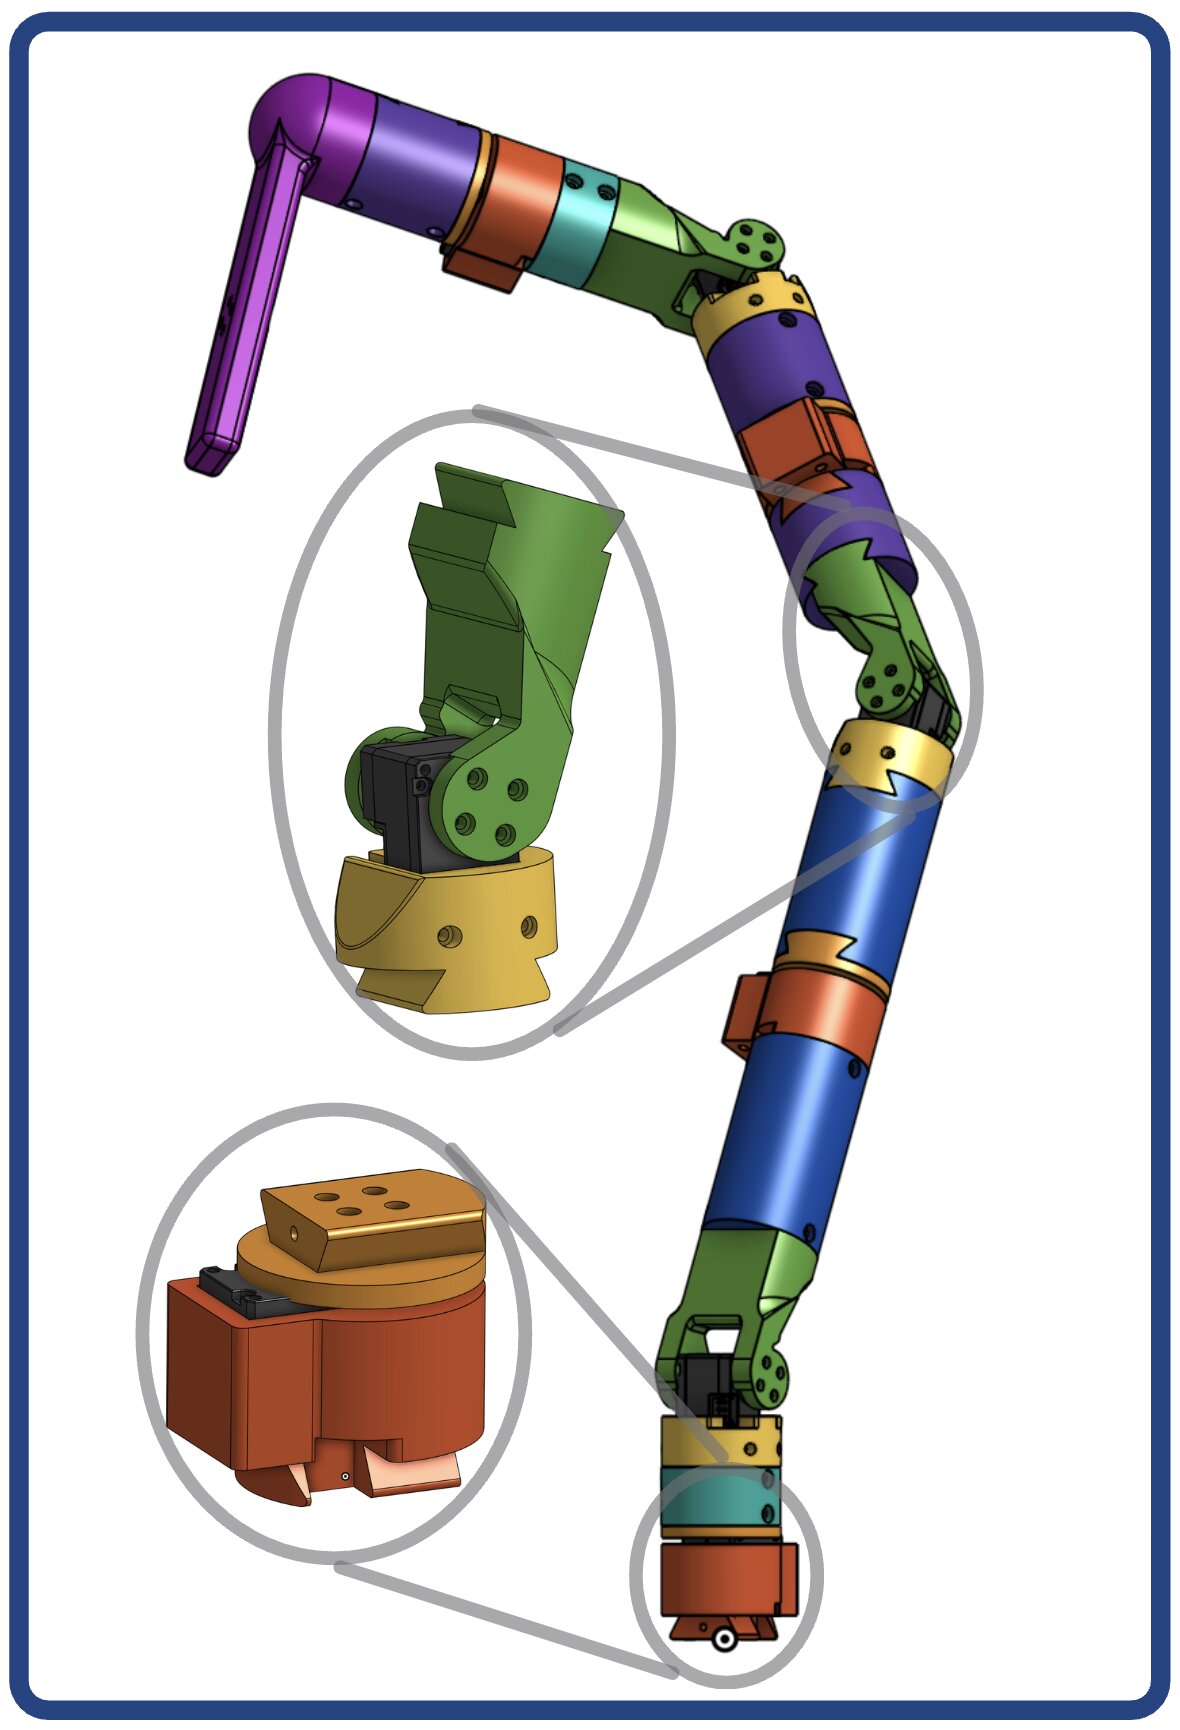
Connect the joints from the base up, alternating elbow–revolute, using the tube connector pieces: slide the corresponding dovetail pieces together and secure each with a screw.
Finally, fit the base joint piece into the base and fasten it with screws.
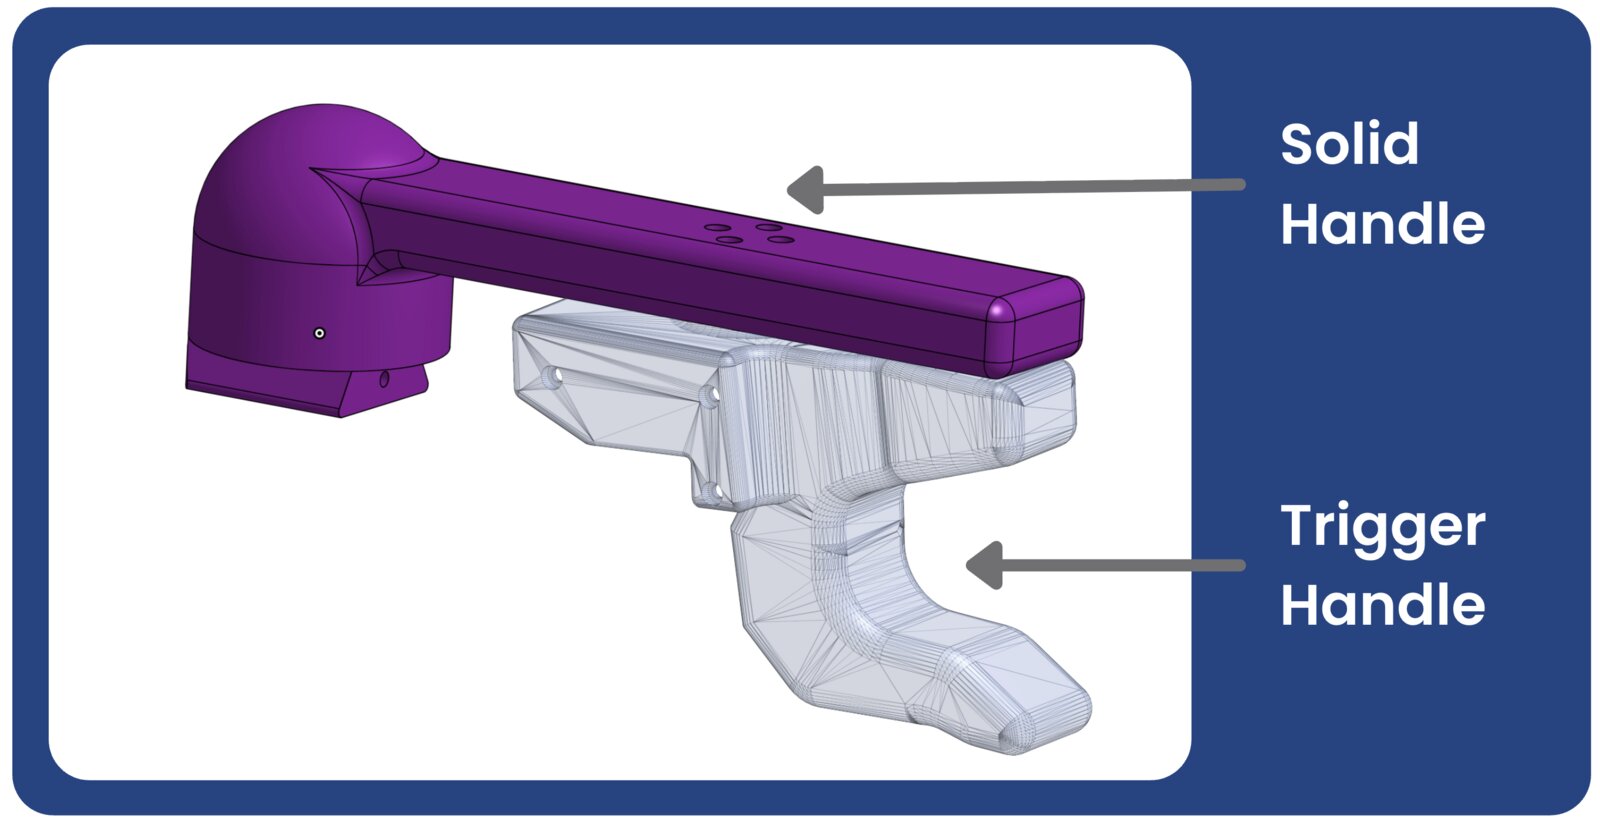
Step 2 · Attach the handle
Attach a solid handle piece to the end of the arm by sliding in the dovetail connector and securing it with a screw. Solid Handle 2 works best for end-effector-only manipulation; either handle works with or without the trigger attachment.
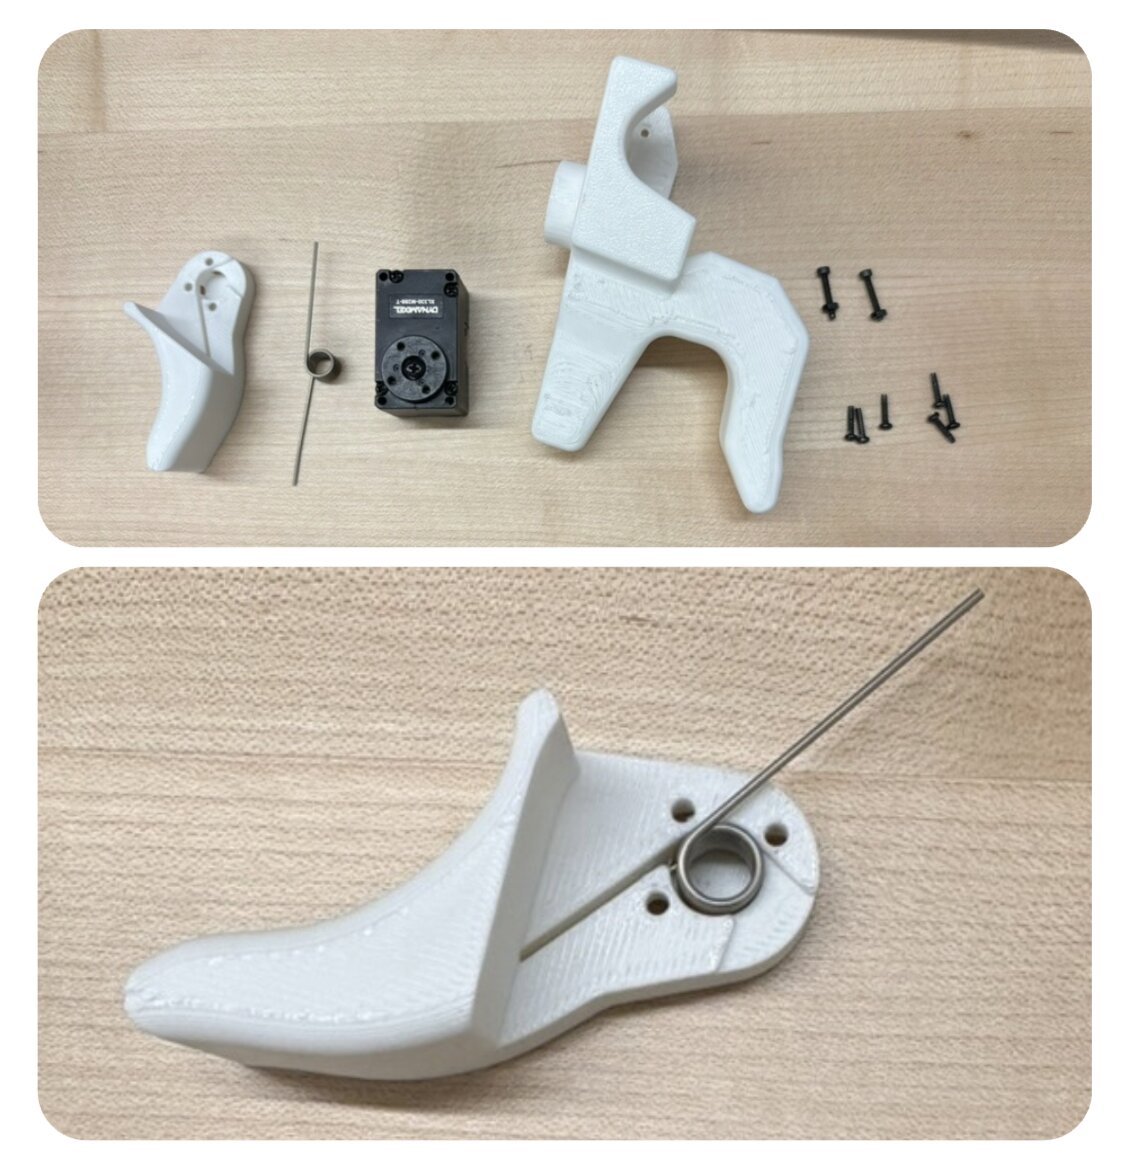
If you are using the trigger handle, add the XL330-M077-T: place the spring inside the trigger, connect the motor, then join the trigger and motor to the handle.
Step 3 · Wire the chain
Daisy-chain the Dynamixel cables from the base joint up through every motor to the trigger.
Step 4 · Connect the controller
Assemble the Dynamixel controller from the U2D2 and the U2D2 Power Hub Board Set, then attach it to the leader arm's base.
Optional · Extra support for the elbow joints
For full rotational freedom, swap the elbow motor housing and output pieces for the alternate parts, which allows 2.44 rad of rotation in either direction. Add rubber bands as shown in the pictures for tensioned support that prevents the arm from suddenly falling or bending. More detail coming soon.
Usage
Full-arm motion
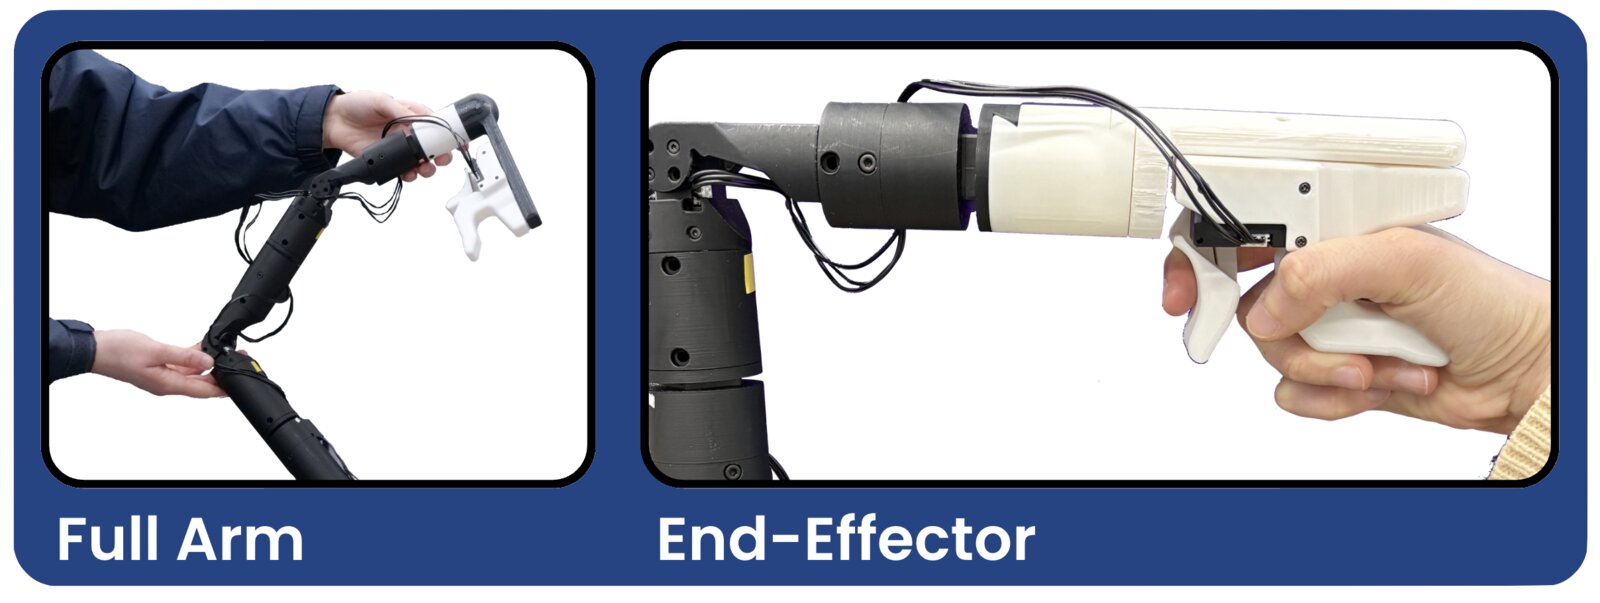
For whole-arm control, hold the leader arm with two hands at two different elbow-joint positions, one near the top of the chain and one near the bottom, and adjust your grip as needed to command all joints.
End-effector only
For end-effector control, attach your preferred handle piece and drive the arm by the handle stick or with your hand around the trigger. With the standing base, the rubber-banded elbow supports above give the best control.
See also: the distributed tactile skin that pairs with this interface for contact-rich data collection.